MisskeyやFirefishの個人鯖立ててみたいけどいきなりweb上でやるの怖い!そうだ!宅内鯖に入れて宅内だけで通信しよう!!
サーバーを立てる所からの個人的メモです~
のくの備忘録サイトです。
MisskeyやFirefishの個人鯖立ててみたいけどいきなりweb上でやるの怖い!そうだ!宅内鯖に入れて宅内だけで通信しよう!!
サーバーを立てる所からの個人的メモです~
なんか…欲しくなっちゃってェ…
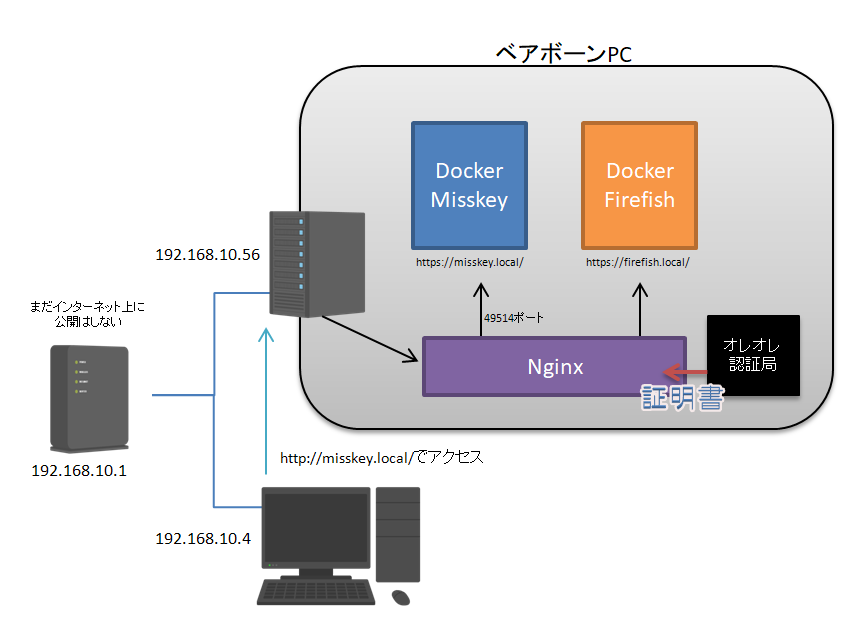
Misskey鯖かFirefish鯖を自分で立てたかったのですが、VPSのプランを大きくするとお金が掛かる&後からダウングレードが出来ず再契約なのとか、宅内だけで動かしてみたかったので宅内鯖用にベアボーンを買っちゃいました。
目標はdockerとかでMisskeyとか色々突っ込んでオレオレ証明書で宅内https通信したりして遊ぶことです。
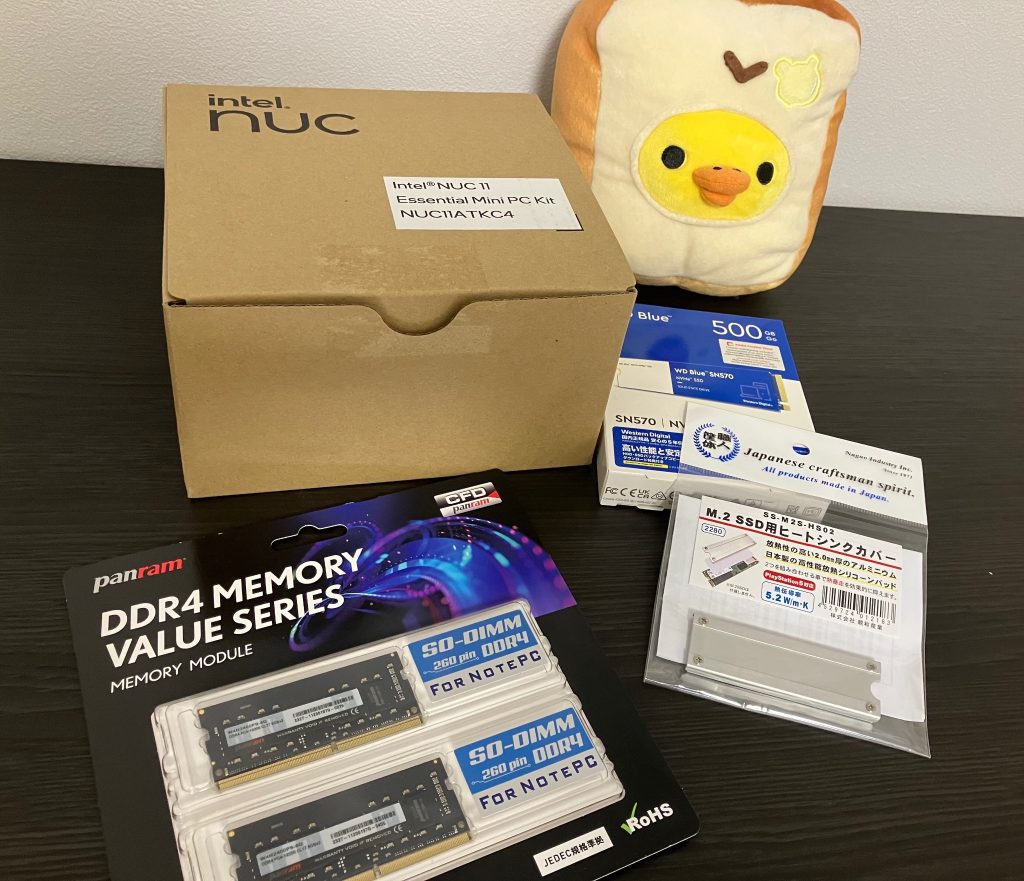
最初はRaspberry Pie4+SDカードあたりでも良いかな…と思ったのですが、飽きたら後でリビング用のPCにも転用できるし…とIntelのNUC Kit NUC11ATKC4を購入しました。やっぱりSoCのベンチマークが全然違うので…。
あとは動かすのに必要な適当なメモリ8GBx2とM.2 SSD 500GB、19V/65W電源ケーブルを購入。
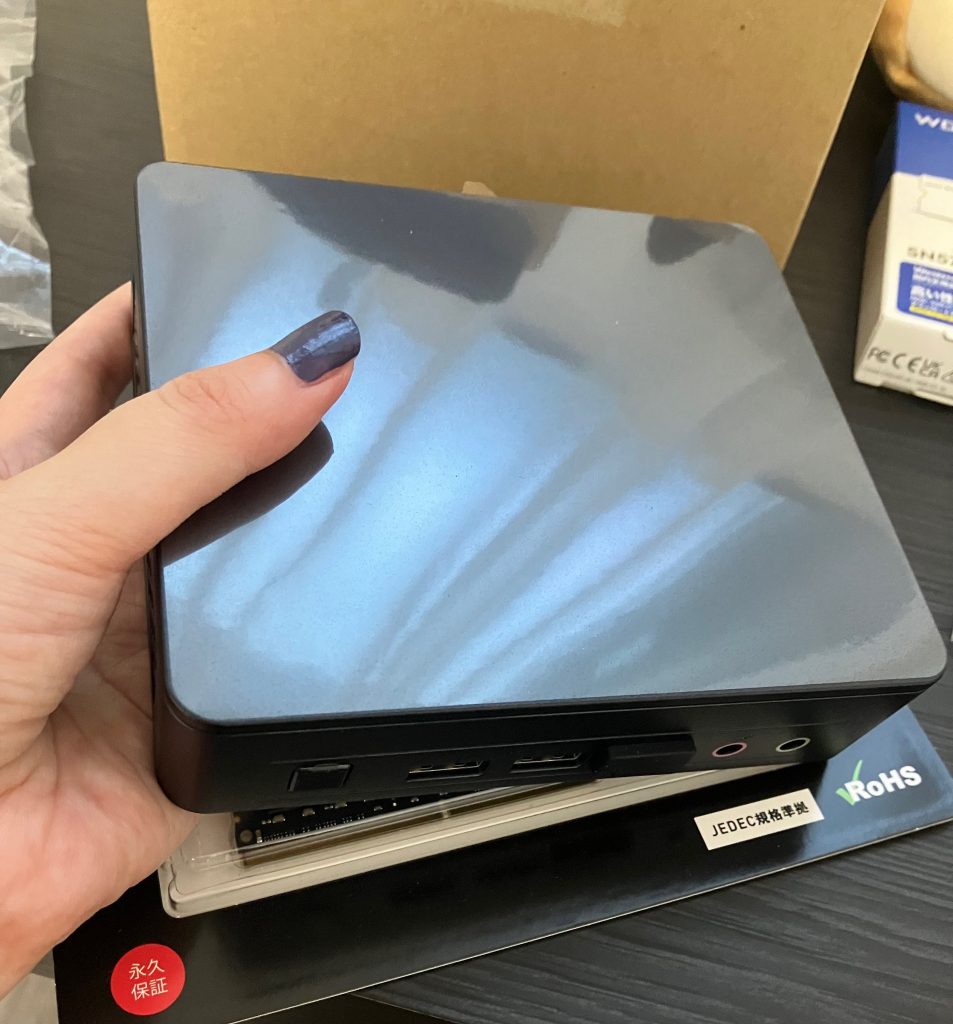
ちっちゃいね。
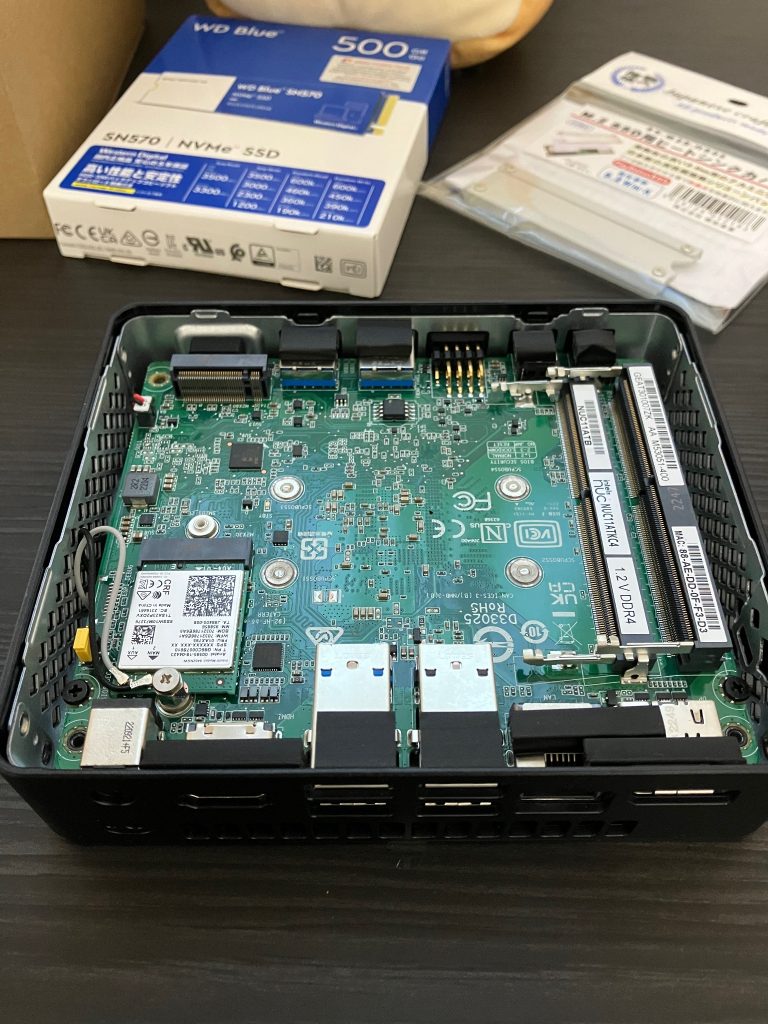
左側にM.2 SSD(Type2280)、右側にSODIMM DDR4(PC4-19200)2枚を取り付けたところ…
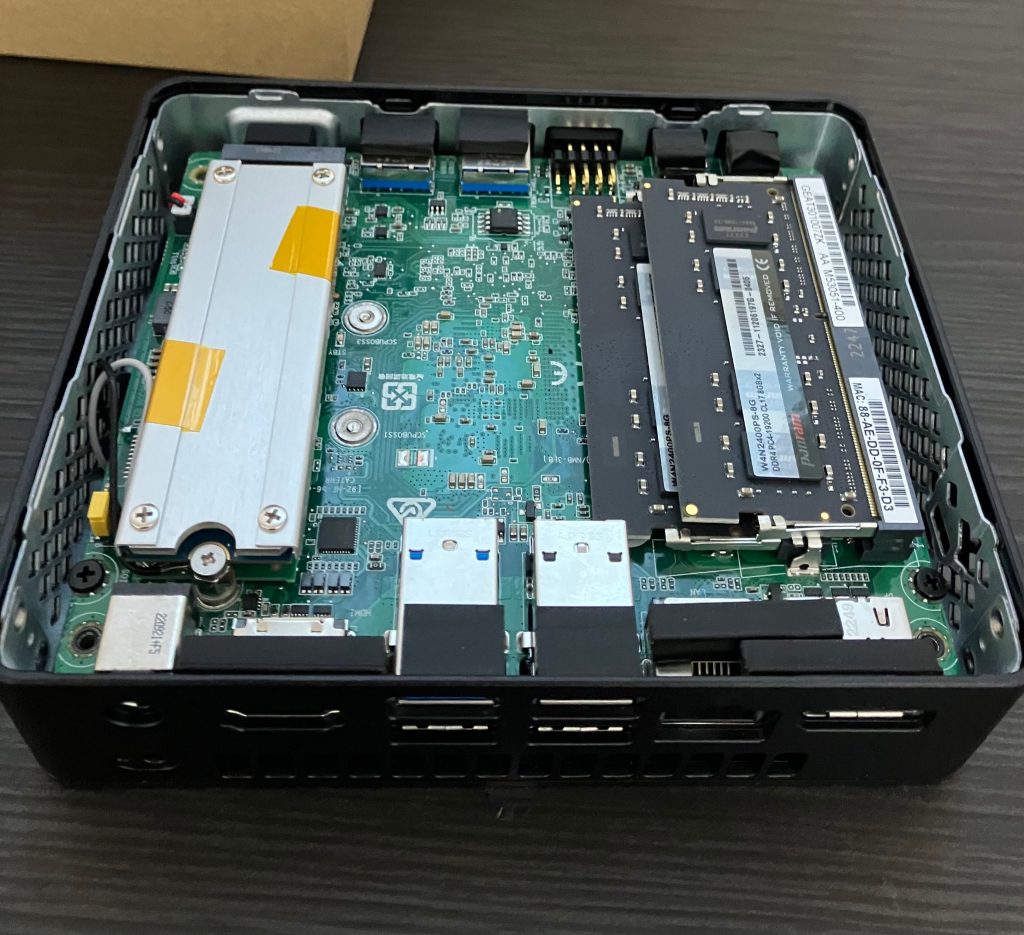
長尾製作所さんのSSD用ヒートシンクカバーSS-M2S-HS02(左)はばっちりケースと干渉してしまいました。2mm厚でも駄目でした…。別のPC作るときに使い回したいです。(;o;)オヨー
最小構成()で起動を確認後、F2キーでBIOSを起動してセキュアブートをオフ&USB First Bootを選んでUSBブートを有効に。
Memtest86+でメモリチェックを何度か回して特にエラーも出なかったため、Ubuntu Server 22.04LTSをインストールしました。
ここでちょっと問題が発生して、宅内LANをまだ引いていなかったためWi-Fiでアプデして設定しようとしたものの/etc/netplan/をいくら弄ってもip aコマンド結果が
 wlp0s2013: <NO-CARRIER, BROADCAST, MULTICAST, UP> mtu 1500 qdisc noqueue state DOWN group default qlen 1000
 link/ether (WifiアダプタのMACアドレス) brd ff:ff:ff:ff:ff:ff
という表示が出て繋がらず…。仕方が無いのでベアボーンとWindowsマシンを有線LANで直接繋ぎ、ネットワーク共有をしてsudo apt updateを噛ませてようやく無線LANでも繋がるようになりました。宅内鯖なので最終的にはルータと有線で繋ぐのですけども…。早く宅内LAN通したいね…(業者に頼むと高いので自力で引くつもり/最近のおうちは最初からCD管通してて良いですね)
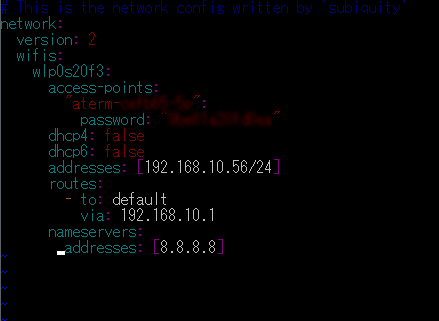
/etc/netplan/内の.yamlファイルを変更して固定IPに、ルータ側でもMACアドレスを静的ルーティングで固定します。
あとは仮想マシンでやったのと同じようにファイヤーウォールを入れたりSSHサーバーを立てて、Windows機からもリモート操作できるようにしました。パスワードを拒否して公開鍵認証のみにしたり…WinSCPも使えるようにしたり…。
SSHの暗号はed25519を使うことにしたのでメモ
ssh-keygen -t ed25519
cd /home/{User}/.ssh/
sudo cat id_ed25519.pub >> authorized_keys
sudo chmod 600 authorized_keys
sudo vi /etc/ssh/sshd_config
VimでPasswordAuthentication no, PubkeyAuthentication yesにして保存、秘密鍵をWinマシンの/.sshに保存して同様にconfig弄ってssh ubuntuとかでアクセスできるように
とりあえずサーバーとして動かせたので何か備忘録があればまたメモしていきます。わあい。
マストドン(fedibird.com)のホームをUserCSSで見た目を落ち着いた感じにしてみました。
ブラウザのアドオンのStylusを使用しています。iPhoneではfeatherクライアントを使用しているのでこれでブラウザからでもすっきりした見た目で使えるかも。iPadの場合はUserScriptに書き換えれば使えるかも


よく見るページのみ触ったので元のままの部分も結構ありそうです。適宜修正するかも
/* navigation周り(普段見ないものを非表示) */
.navigation-panel a[href*="timelines/public"],
.navigation-panel a[href*="/web/accounts/2"],
.navigation-panel a[href*="/web/circles"],
.navigation-panel a[href*="/web/group_directory"],
.navigation-panel a[href*="/web/directory"],
.navigation-panel a[href*="/web/suggestions"],
.navigation-panel a[href*="/web/trends"],
.navigation-panel a[href*="timelines/tag/fedibird"]{display:none !important;}
.navigation-panel a span{display:none !important;}
.reactions-bar__item{background-color:#eeeeee;
    border-radius:8px !important;}
.column-link{border-radius:10px;}
/* カラム周り */
.compose-form__publish button{background-color:#aaa;border-radius:10px}
.compose-form,.compose-panel{border-radius:10px !important;
    flex: 1;
    overflow-x: hidden;
    margin-bottom:0 !important;
    padding-bottom:0 !important;
    min-height: 10px !important;}
.compose-form__poll-button{display:none !important;}
.columns-area__panels__pane__inner{position: static;}
.columns-area__panels__pane__inner{width:auto;}
.column-link__icon {margin:0;}

/* header */
.column-header__button,.notification__filter-bar button{background-color:#aaa;}
.column-header,.column-header__back-button{background-color:#ccc;}

/* footer */
.getting-started__footer {opacity: 0.2;}CSSではなくプラグインです。設定→プラグインに入力して下さい
※2024/5のMisskeyバージョンアップにより不具合発生したためコードを書き直しました。新しいコードを利用下さい。
Misskeyのノート上の特定の文字列を置換するプラグインです。
通常・RN・返信のユーザー名・注釈・本文を置換します。
他にも置換したいものがあればlists内を書き換えてください。
とりあえずサンプルではにじみすサーバーの動きの速いカスタム絵文字とrainbowタグ→scaleタグへ置換されるように書かれています。
{a: "置換前の文字列", b:"置換後の文字列" }のように記載してください。
/// @ 0.18.0
### {
  name: "置換プラグイン"
  version: "0.0.2"
  author: "@[email protected]"
  description: "特定の文字列を置換します"
  permissions: []
  config: {}
}
Plugin:register_note_view_interruptor(@(note){
  // {a: "置換前の文字列", b:"置換後の文字列"}
  let lists = [
    { a: ":ablobfoxhyper:"; b: ":blobfoxowo:" }
    { a: ":ablobcathyper:"; b: ":ameowbouncefast:" }
    { a: ":moshakoparty:"; b: ":moshako:" }
  ]
  for let i, lists.len {
    if (note.renote == null ) {
        if (note.text != null) note.text = note.text.replace(lists[i].a, lists[i].b)
        if (note.cw != null) note.cw = note.cw.replace(lists[i].a, lists[i].b)
        if (note.user.username != null) note.user.username = note.user.username.replace(lists[i].a, lists[i].b)
    }
    if (note.renote != null) {
      if (note.renote.text != null) note.renote.text = note.renote.text.replace(lists[i].a, lists[i].b)
      if (note.renote.cw != null) note.renote.cw = note.renote.cw.replace(lists[i].a, lists[i].b)
      if (note.renote.user.username != null) note.renote.user.username = note.renote.user.username.replace(lists[i].a, lists[i].b)
      if (note.renote.reply != null) {
        if (note.renote.reply.text != null) note.renote.reply.text = note.renote.reply.text.replace(lists[i].a, lists[i].b)
        if (note.renote.reply.cw != null) note.renote.reply.cw = note.renote.reply.cw.replace(lists[i].a, lists[i].b)
        if (note.renote.reply.user.username != null) note.renote.reply.user.username = note.renote.reply.user.username.replace(lists[i].a, lists[i].b)
      }
    }
    if (note.reply != null) {
      if (note.reply.text != null) note.reply.text = note.reply.text.replace(lists[i].a, lists[i].b)
      if (note.reply.cw != null) note.reply.cw = note.reply.cw.replace(lists[i].a, lists[i].b)
      if (note.reply.user.username != null) note.reply.user.username = note.reply.user.username.replace(lists[i].a, lists[i].b)
    }
  }
  note
})Misskeyの記事のURLをPocketサービスへ送信するボタンを付けるUserScriptです。
Google KeepはAPI非公開、EvernoteはAPIがありますがあまりUserScript向きではないようでした。
仮想DOM生成時に実行されるため、少し重くなるかもしれません。
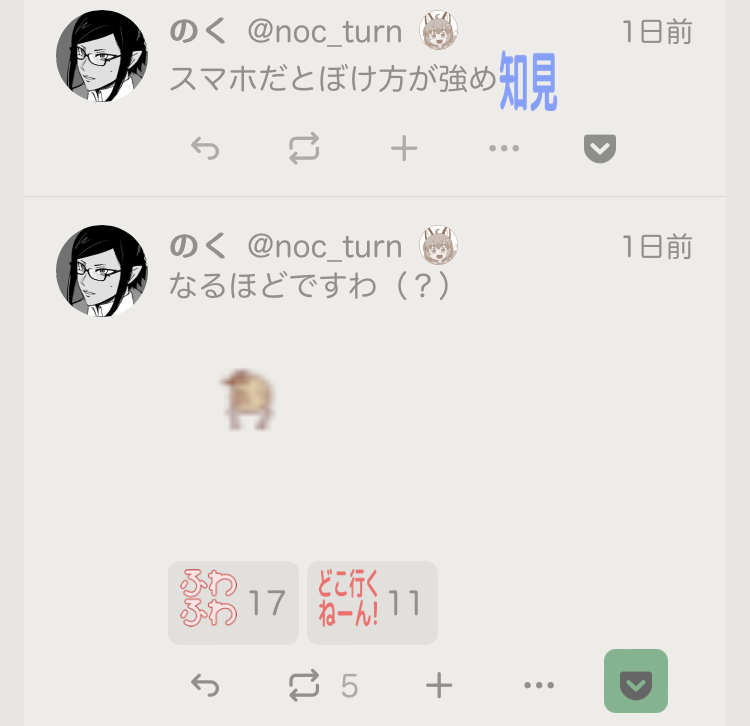
正常に送信が行われると緑色になります。(API送信時に確認のため色を変えているため、Pocketへ保存されている記事の色が変わるわけではありません。)
Pocketに登録し、API利用のためカスタマーキーとアクセストークンを取得します。
上記サイトを参考にして取得しました。
PCブラウザ, Android, iOSでのそれぞれの導入方法はこちらの記事を参照ください。
下記のうち@matchのURLを利用するMisskeyのサーバーへ、consumer_key、access_tokenを取得したPocket APIのカスタマーキーとアクセストークンへ書き換えてください。
// ==UserScript==
// @name         Save URL to Pocket
// @namespace    @[email protected]
// @version      1.0
// @description  Saves the URL to Pocket when the specified button is clicked
// @match        https://nijimiss.moe/*
// @run-at      document-idle
// @grant        GM_xmlhttpRequest
// ==/UserScript==
// ボタンを生成する関数
function createPocketButton(article) {
    const footer = article.querySelector('footer');
    if (footer) {
        const pocketButton = document.createElement('button');
        pocketButton.classList.add('_button', 'xviCy', 'pocket-button');
        pocketButton.style.height = '32px';
        pocketButton.style.borderRadius = '6px';
        const pocketIcon = document.createElement('img');
        pocketIcon.setAttribute('src', 'https://blog.estampie.work/pocket.svg');
        pocketIcon.setAttribute('width', '16');
        pocketIcon.setAttribute('height', '16');
        pocketIcon.classList.add('xeJ4G', 'x5kTm', 'x9Io4');
        pocketButton.appendChild(pocketIcon);
        pocketButton.addEventListener('click', () => {
            const noteElement = article.querySelector('a[href^="/notes/"]');
            if (noteElement) {
                const notePath = noteElement.getAttribute('href');
                const fullURL = 'http://nijimiss.moe' + notePath;
                GM_xmlhttpRequest({
                    method: 'POST',
                    url: 'https://getpocket.com/v3/add',
                    headers: {
                        'Content-Type': 'application/json; charset=UTF-8',
                        'X-Accept': 'application/json',
                    },
                    data: JSON.stringify({
                        url: fullURL,
                        consumer_key: 'カスタマーキー',
                        access_token: 'アクセストークン',
                    }),
                    onload: function(response) {
                        if (response.status >= 200 && response.status < 300) {
                            // API送信が成功した時の処理
                            pocketButton.style.backgroundColor = '#77b58c'; // ボタンの背景色を緑に変える
                        } else {
                            // API送信が失敗した時の処理
                            pocketButton.style.backgroundColor = '#FF0000'; // ボタンの背景色を赤に変える
                        }
                    }
                });
            }
        });
        footer.appendChild(pocketButton);
    }
}
// DOMが変更されたときに実行される関数
const observerCallback = function(mutationsList, observer) {
    for(let mutation of mutationsList) {
        if (mutation.type === 'childList') {
            const articles = document.querySelectorAll('article:not(.has-pocket-button)');
            articles.forEach(article => {
                createPocketButton(article);
                article.classList.add('has-pocket-button');
            });
        }
    }
};
// MutationObserverを設定
const observer = new MutationObserver(observerCallback);
observer.observe(document, { childList: true, subtree: true });
// 初期ページの記事にボタンを追加
const initialArticles = document.querySelectorAll('article');
initialArticles.forEach(article => {
    createPocketButton(article);
    article.classList.add('has-pocket-button');
});下記カスタムCSSを併用すると二行にならずに済むかもしれません。数値は任意で変更してください。
.xviCy:not(:last-child) {
    margin-right: 14px !important;
}前回はwebサーバーを立てるところまでやってみました。
サイトのデータがリモートリポジトリのmasterブランチにマージされたらNext.jsアプリをビルドして公開ディレクトリに同期というのをGitHub Actionsでやってる方を見てそれやりたいな~~と思いました。ただGitHubは性的な内容は駄目で同人サイトには向かないので、その辺の絡みでさくらVPSで同様の機能をやりたい感じです。
今回は仮想サーバー上にリモートリポジトリを作成してWindows側のVScodeからSSH接続でpushできるようにします。さらにリモートリポジトリにpushされたらGit HookでNext.jsアプリをビルドしてrsyncで公開フォルダに同期します。
何言ってるのかよくわかんないですが「サイトの更新準備が出来たらボタンポチーでサーバー上のデータが更新できて、弄った部分の変更履歴も取れる」みたいな感じ
のくです。最近めっきりMisskeyのにじみす鯖にいます。昔の雑談掲示板のようで居心地が良いです。
MisskeyはActivityPubのプロトコルを使用した分散型SNSで、Mastodonに比べて思想的(反中央集権主義)なものも少なくまったりしています。
作品を載せる場の所感としては(ActivityPub全体がそうですが)
などが創作物の公開に関してはちょっと難があるように感じました。
そのためか、Misskey内部の創作系鯖では個人サイト作成で盛り上がってる部分もあり、私も個人サイト作りたい!!という気持ちがどんどん湧いてきました。
というかここも個人サイトなのですが、一昨年使用していないMovableTypeが脆弱性を突かれて改竄されスパムの踏み台にされたため、該当のディレクトリ以外は改竄されなかったのですがコンテンツを色々と下げてしまいました…。
せっかくなので新しいことがやりたい!という気持ちもあって、
あたりを目標に考えています。以前HTML4+PHPで動的サイトを作っていて、技術の進歩にちょっと浦島太郎ですが頑張りたいです。
Misskey v13.11現在、ハードミュートはリプライ元やリノートを貫通します。
プラグイン等で弄れる部分ではないため、ブラウザ側で強制非表示にするUserScriptを作成しました。
ブラウザにTampermonkeyなどの拡張機能を入れることで利用できます。
下記の// @match https://nijimiss.moe/*の部分を使用するサーバーに書き換えてください。ngWords = ["ミュート", "NGワード"];部にNGワードを指定/追加してください。
(AND指定などはできません)
仮想DOM生成の度にループ処理を回すので、NGワードの数が多いと重くなります。ご注意ください。
// ==UserScript==
// @name     Misskey Mute
// @version      0.1
// @description  Mute words on misskey
// @author  @[email protected]
// @grant    none
// @match        https://nijimiss.moe/*
// @run-at   document-idle
// ==/UserScript==

(function () {
    'use strict';
    // NGワードを設定
    const ngWords = ["ミュート", "NGワード"];
    const observerConfig = {
        childList: true,
        subtree: true
    };

    function observerCallback(mutationsList, observer) {
        for (let mutation of mutationsList) {
            if (mutation.type === 'childList') {
                const divs = document.querySelectorAll('div[tabindex="-1"]');
                divs.forEach(div => {
                    const divText = div.innerText.toLowerCase();
                    for (let word of ngWords) {
                        if (divText.includes(word.toLowerCase())) {
                            div.style.display = 'none';
                        }
                    }
                });
            }
        }
    }

    const observer = new MutationObserver(observerCallback);
    observer.observe(document.body, observerConfig);
})();
上記のソースをテキストエディタにて適当な名前.js(misskeyng.jsなど)で保存し、iCloudドライブなどに適当なフォルダ(Userscriptsなど)を作って入れておきます。
下記のアプリをインストールします。
Userscripts
UserScriptをiOSのSafariでも実行できるようになるアプリです。
</>のアイコンがあるかもしれません。Macも同アプリにて利用できるようです。今Macbookが使えないので下記などを参照ください。
UserScripts 公式GitHub
Chromeは拡張機能が使用できないので利用できません。
FireFoxは
Tampermonkey – Android Firefoxアドオン
から導入できます。
Firefoxの右上の︙からTampermonkeyを選び、新規スクリプト作成を行って上記コードを記述してください。
Tampermonkeyやgreasemonkeyなどの拡張機能を導入することで使用できます。
Tampermonkey – Chromeアドオン
Tampermonkey – Firefoxアドオン
Tampermonkey – Edgeアドオン
拡張メニューの「新規スクリプトを追加」から上記コードを貼り付けてください。
MisskeyはカスタムCSSで見た目を変更したり、AiScriptという独自言語でウィジェットやプラグインやゲームを作成できます。
自作したもの置き場です。23/7/23最終更新 Misskey v13.14.1対応